Christmas Countdown

mandag 30. januar 2012

Heddas elegant birthdaycard

My daughter Hedda (10 years) has made cards again. She finished this birthdaycard earlier today (sick and home from school, it's nothing else to do but cardmaking or reading).
We've found a wonderful challengeblog for kids; La-La-Land Crafts For Kids, where she found the challenge "2 different ribbons" that inspired her to make the card. Then she asked for a sketch (should think she was a pro, listening to her talking about "sketches", adhesives, colours and cutting and so on - LOL. Well, I found some sketches around, and she picked this one from Sketch Saturday.
She has used papers from Papirdesign, the stampimage is from Lalaland (rubberstamp, this one) that she has coloured with aquarellepencils. The textstamps are from Kort&Godt (outside) and Kreativ Hobby (inside). She has distressed all of the edges of the DPs. Inside she has used the Spellbinders to make the "greetingpanels" (picture below).
When she had finished the card I was sent outside to take pictures - LOL.
I think she has done a great job on this one, so I thought I'd help her putting it into some challenges:

La-La Land Crafts For Kids
- 2 different ribbons
Sketch Saturday - Sketch
Scrapperiket - Anything Goes


lørdag 28. januar 2012

PINK Birthdaycard

Another Blogpost from me today - thought I'd use the weekend to post some of the things I have made recently. Then I should do a little tidying in my picturefolders on the PC - I try to see through it and sort it at the end of every month...
Well - it seems like I'm back to girlycards, at least this must be said to be "girlygirly".
I've used Kraftcardstock for the base of the card, the DPs are Hanoverian V&A - supercute papers!
I've had the flowers in my stash for ages, here I've put a liquid pearl in the middle of each flower, then I "painted" both flowers and butterflies (Martha Stewart punches) with Glimmerglam Glitterpaint - I LOVE how it sparkles!
The image and the banner are Magnoliastamps, the text on the outside is an old freestamp, the insidetext is a stamp from Kreativ Hobby.
The swirls are made with Spellbinders-dies.
Of course I've coloured Tilda with ProMarkers :D
The panels are sewn to the pink cardstock, before it is attached to the Kraftcardstock with doublesided tape.

Here's a close-up, where you can see the sparkle better (I think my pink-colouring has improved...)
And here's the inside, same "layout" on both sides, but reversed on one of them - I think that works the best :)

Challenges I enter this card into:
Kort o Mania - Søtt som Sukker
Deep Ocean - Sparkling and/or Glitter
Papertake Weekly - Happy Highlights
Crafts and Me - Pink and Sparkly
Charisma Cardz - Pretty in Pink


Christmascard in Green, Creme and Beige

This is my fourth christmascard in January - I love making christmascards, and try to make a few every month.
I have bought some of Bildmålarnas stampimages - i think they are sooo cute - so now I practise colouring them. Tricky to find the right "touch" with new brands, I think.
I've used papers mainly from Pion. The edges are torn, ripped, sanded and distressed - quite messy around here when I finished that part - LOL
The insidetext is from Storyteller, and on the backside I used my personal stamp.

Close-up:
Inside:
Backside:

I'll enter these challenges:
Sketchy Colors - Green, Beige & Creme
NSHK - Sketch

fredag 27. januar 2012

Girly Birthday-Giftbag with Pink Polkadots

It's Friday and we have a new challenge for you over at Fussy and Fancy.
This time we want to see Polka Dots - the DOTS can be on your paper, ribbons, buttons, flowers, images - wherever :D
I have made (what I think is) a really girly giftbag - with the dots on the papers (from Panduro), and on the ribbons (Panduro those too).
For the panel behind the image (SugarNellie) and the tags I used my brand new Spellbinderdie - have a feeling it may become a favourite for a while...
I've kept everything in pink shades here (It IS for a GIRL!).
The backside of the bag is made using the same sketch (Sunday Sketch & Stamp). Here I've stamped on a simple greeting (this stamp came with a magazine a long time ago, and I really like it).
Now - click over to Fussy and Fancy, to check out and join our new challenge :D


I'll also enter my Pink Girly Giftbag into these challenges:
Sunday Sketch & Stamp - Donnas Sketch
Crazy4Challenges - A Child's Birthday Card
Stamptaular Sunday - Seeing Spots
Simon Says Stamp! - Anything Goes
Little Darlings - Polka Dots
DYSU - Ribbons
Charisma Cardz - Pretty in Pink
Scrap'a'Long - Anything Goes

***

søndag 22. januar 2012

Birthdaycard - Again

Here's my latest card - a birthdaycard (already forgotten about my intention to make boyscards...) very inspired by the sketch at this weeks TOMIC-sketch. With that challenge I even got back to sewing on FABRIC - wich I haven't done in ages!
Papers are from Magnolia and Cardstock's from Bazzill. I used a swirldie from MarianneDesign Creatables, Punches from Martha Stewart (Edgepunch and Butterfly).
The Stampimage is Magnolia and the textstamp is from Kreativ Hobby.
The image is coloured with ProMarkers.
Edges are distressed (all with a distresstool and some with DistressInk WalnutStain too).

Here's a picture showing some details; the bow, the pin, the beadstrings, hopefully the tiny pearls I made using Liquid Pearls (White Opal) and Tilda:
I made the card as an Easelcard. The inside is made as a pocket, with a little distance to keep the "easel" standing. Inside the pocket I placed a tag (but forgot to take pictures, and now it's too dark to do it...)

I'll send my Birthdaycard to these challenges:
TOMIC #33 - Sketch
Delightful Challenges - Distressed/ Vintage
I Love ProMarkers - Anything Goes
The ABC Challenge - H for Happy Birthday
Crafts And Me - Use Pins

***

onsdag 18. januar 2012

Black and white Birthdaycard

I have tried to colour an image in "Black and White" - as the challenge at MDUC was this week. I have tried this colouring a couple of times before, and I really like it. I find it kind of relaxing to colour "without colours" :)
To put the card together I used the sketch from Sketchy Colors (Their 100.th Challenge!), and I dusted off the sewing machine to sew around the edges.
I used papers (from Majadesign) in black/ white/ with a little touch of light pink - and added a little light pink bow and three very, very light pink (almost white) roses.
I used a black lacefabric underneath the diecutpanel (Nellies Multiframes), and tied a bow with a black lace. All pearls are made with Liquid Pearls.
I also made a few "dewdrops" on the leaves and flowers with tiny GlossyAccents-pearls.
On the banner I wrote "Gratulerer" by hand with a light grey felt-tip-pen.
Inside the card I made a giftcardpocket, and punched out panels with a Martha Stewart punch (Punch around the page).
On the left side I stamped a birthdaygreeting, and the right side I left blank for personal greetings.
All edges are distressed with DistressInk BlackSoot.
The next two pictures show the inside and a close-up of Tilda, and at the bottom of the post you'll find the challenges I'll try my luck in...


Sketchy Colors - Sketch
Magnolia Down Under Challenge - Black and White Image
Scrapperiket - Søm
I Love ProMarkers - Anything Goes
Tuesday Throwdown - Neutral Colours
Sew Many Challenges - Anything Goes
Scrappy Frogs - Lace

mandag 16. januar 2012

Heddas Calendar

Hei, jeg heter Hedda. Jeg er 10 år. Jeg liker å lage kort og slikt sammen med mamma.
Her ser dere kalenderen jeg har laget. Jeg gleder meg til sommeren, derfor har jeg laget denne kalenderen gul. Jeg liker magnoliastemplene veldig godt, denne har jeg farget med promarkers.
Jeg stemplet figuren på et mønsterark og klippet ut kjolen og sokkene. Så limte jeg dem på henne. Mamma sier at det kalles paperpiecing.
Jeg pyntet med blomster, blader, bånd og ei sløyfe. Så farga jeg noen sommerfugler med promarkers og limte på kalenderen.

Hi, my name is Hedda. I'm 10 years old. I like to make cards and stuff together with my mother. Here is the calendar I made. I have made a yellow calendar, because I look forward to the summer. I like the Magnoliastamps very much. I coloured this with promarkers. I stamped the image to a designpaper and cut out the dress and the socks. Then I glued them onto the image. Mum says its called paperpiecing. I decorated with flowers, leaves, ribbon and a bow. Then I coloured a few butterflies with promarkers and glued them to the calendar.


Her er sommerfuglene:
Here are the butterflies:
Jeg skal prøve å være med på disse utfordringene:
Simply Magnolia - Anything but a card
Panduro Hobby - Kalender (de 4 årstider)
Alphabet Challenge Blog - Y for You can choose
Gingerloft - Anything Goes
OLLCB - New beginnings
Let's ink it up - Anything Goes


Tusen takk til mamma for hjelp med oversettelse og linkene :)


New Year - New Calendar

A little late maybe, but Happy New Year everybody!
Here's the Calendar I made for 2012.

Since this is a calendar that is supposed to be on display and use throughout the year, I felt I had to make it suitable for the whole year. If I'd make one section for each month I'd better be starting on the calendar for 2013, to get it finished in time...
So I divided it in 4, one for each season of the year; winter, spring, summer and fall (think it sounded like a song, when I read it...)
I have used Magnolia stampimages, Tilda and Edwin that I thought fitted the seasons. Designpapers used for backgrounds are all from MajaDesign. Everything used is old stuff and stash, but the calendar is new - 366 brand new days :D

When I sat down to make this one Hedda came and wanted to make her own calendar. I'll help her put it into the blog later today (she's very "do-it-myself", and wants to have her own blog. I think she's a little too young as she is only 10 years old ("very soon to be 11", I'd guess she'd correct me, if she'd hear me or read this - LOL), but for now she'll have to borrow mine).


It'll go to the challenges at:
Panduro Hobby - Kalender (de 4 årstider)
Let's Ink It Up - Anything Goes
Papirdokkene - Noe gammelt og noe nytt (something old and something new)
Alphabet Challenge - Y for You Can Choose
Stampin' for the Weekend - Out with the Old
OLLCB - New Beginnings
Gingerloft Challenge - Anything Goes

****

tirsdag 10. januar 2012

One Layer Card

Haven't I been brave! I've made an One-layer-card!

Ever since I saw the One-Layer-Card-Challenge at Ett Trykk - Norsk Stempelblads blog I have wanted to try to make one. It scared me a bit, especially the part about stamping directly to the cardstock - it didn't give much room for mistakes...
I spent some time thinking over how I wanted the card to be, not being able to make any bigger changes as I went on...
I masked the motive together, both images, text and the sentiment on the envelope. I used pencils for colouring this time (many images since I used pencils...)
The snowflakes are stamped with Versamark, then heatembossed with white embossingpowder. I also used a white Sakura Glaze pen and doodled in some tiny white dots here and there.
The snow Tilda is sitting on (or in...) is Aleene's True Snow, painted on with a spatula (it shows better in a picture further down).
On the envelope I stamped the same image and the sentiment "God Jul" (Merry christmas), and heatembossed it with clear embossingpowder (also in a picture furter down).
All in all, i'm quite pleased with how it turned out :)


The Challenges I'll send my One-Layer-Card to:
Ett Trykk - One Layer Card
Magnolia Stamp Lovers - Kraft
MDUC #128 - Anything Goes
Creative Belli #134 - Snowflakes
Heidis Hobbystuggu - Vinter
Stamp, Scrap & Doodle Saturdays - Winter Something
Gingerloft Challenge #31 - Anything Goes
Papiravisen - Vinterdrøm

***

mandag 9. januar 2012

Birthdaycard in Pink and Brown

Yesterday I made a really girlish birthdaycard.
ProMarker Norges very first challenge say "Pink and 1 other colour". After long consideration I chose that other colour to be brown.
Finally I found a place to use the pink lace I bought years ago (at Kort&Godt). I knew it would come in handy one day ;)
...and the pink buttons... that I seem to have a gazillion of... here I used 3 of them.
I think pink ProMarkers are a bit tricky to use, I often feel the colours doesn't blend as well as I want them to, sometimes the colours doesn't look how I want them to - but as I practise and read, I have found some combinations that work quite well together, now I've even started to write them down too ;) But I've also noticed that combos that work well on Letraset papers doesn't work so well on Bristol Board, and vice versa...
Here comes a little closer picture, where it's easier to see the details, like the Glimmermist (Dazzling Diamonds) I sprayed over the whole card before I attached Tilda, the sentiment and the flowers. I've also used a pink paperdoily (Glimmermist over that too). Inside the flowers I used Liquid Beads.
All edges are distressed and brushed (quite heavily) with DistressInk WalnutStain.
And, can you see! - I even had a brown lace in my stash!
Here's the inside, clean and simple with only an embossed birthdaygreeting :)
I'll enter my pink and brown girly birthdaycard into these challenges:
ProMarker Norge #1 - Rosa og en valgfri farge
I Love ProMarkers #98 - Buttons & Lace
Sketch N Stash #78 - Sketch
Scrappekammeret #45 - Bursdag
Scrappy Frogs - Lace Challenge
NSHK #45 - Girlish
Scrap'a'Long #12 - Anything Goes
Just Magnolia #138 - Anything Goes
MDUC #128 - Anything Goes
Simply Magnolia - Celebrate
Magnolia-Licious Highlites - Anything Goes

***

lørdag 7. januar 2012

January Christmascards

Here are my Christmascards for January for Hjertebodens Juleblogg - and for a "few" other challenges. I turned to some other challengeblogs too, and GOSH! there are many, many wonderful cardmakers out there to get inspiration from!

This will be a long post, so grab a cup of coffee and the christmascookieleftovers and stay with me for a little while :)

Hjertebodens Julebloggs challenge is to make three christmascards every month of the year, this month at least one of the cards has to be non-quadratic. I chose to make all three card as shaped cards. I used my Spellbinders to make the cardstockbases for the cards, with different dies.
The stampimages are also quite similar for the three cards, as I used my loved Magnolias (can't get enough of those...), and coloured them with ProMarkers (can't get enough om those either - LOL)
All cards are made as Easel-cards, as Christmas Craftings challenge #17 says :)

Now, I'll present the cards, one by one, to you:
The first one is for, besides Hjertebodens Juleblogg, the challenges at:
TOMIC - Sketch and colour combo Blue/ White/ Glitter. I ended up reversing the sketch, I hope they'll accept that...
Magnolia-Mania want to see SNOW in their challenge. Here is snow on the trees, in the background (heatembossed) and around...
Stamptacular Sundays challenge sound "DOILIES make the world go round", so I used a doily inside the card, for the tagpocket. I had to "lace it up" a bit, and put on some liquid pearls - I love those pearls!
Kort 'o' Mania says "Punch it! Dies it! Cut it!" in their latest challenge, so I've punched snowflakes, shapes (and DP-panels) are dies'ed, and the threes and the image are cut ;)
Here comes the second card:
The frontside-text (NorthStarStamps) is placed inside a shakerbox. It isn't the first time I've tried to make a shakerbox, but it's the first time I'm so satisfied with it that I can show it...
Deep Ocean Challenge want to see "Lot of White", so this card is mainly white, with a teeny-tiny cold, blue touch.
Creative Belli Blogs challenge #134 is "Snowflakes" - can you see all the snowflakes I've used, with glitter and pearls on ( I often wonder of it is the possibility to use glitter that makes me such a fan of christmas- and wintercards...LOL)
DYSU has the challenge "Let it Snow" going, it's a photoinspirationchallenge, and I think this card should fit that challenge quite well.
Papercraft Star also has a winterphotoinspirationchallenge, which I'll send my card to.
Creative Card Crews challenge is "Snow Day", so I'll enter there too.

Inside I used a Frosty the Snowman-textstamp from Magnolia.

My third christmascard for January has COLOURS - I felt I needed to work with bright colours after making two almost "colourless" cards...
...so I grabbed for red and green, cinnamonsticks and red rhinestones, my red "season's greetings scented"-inkpad, and my red glitterpen- the "white" spots that shows white on Tildas clothes in the first picture are actually red glitter :)
This one will go for the Crafts and Me Christmas Bumper Challenge "Anything Goes".

Materials used:
Bazzill Cardstock
DP from: Maja Design, Papirdesign, Scrappers Choice, 3ndy Papir
Ink: Adirondack Earthtones Espresso, Versafine Onyx Black, Versamark, Ranger Seasons Greetings, Versacolor Sky Blue, DistressInk OldPaper and WalnutStain.
Stamps: Images from Magnolia.
Texts from: Magnolia, Kreativ Hobby, North Star Stamps, Papirdesign, Storyteller.
Colouring: ProMarkers
Punches from McGill and Tonic
Dies from Spellbinders and Magnolia
Other stuff used: Glitter, Liquid Pearls (White Opal), Liquid Appliqué, DecoArt Snowwriter, Glimmerglam Glitterpaint (Chandelier), Rhinestones and Ribbons...

***

fredag 6. januar 2012

Telescoping Birthdaycard with Animal Print

Good Morning, friends and visitors :D
Here's a little card I've made for Fussy and Fancy's Challenge #53 "Happy Birthday to Us/ Use an Animal Print". This challenge is now into its second (last) week, so hurry in and join us!

I made my card as a Telescoping Card. I've seen these cards around, and think they are so cute, so I was really happy when I found a very easy-to-follow tutorial at Splitcoaststampers.
The papers came free with a magazine a while ago - very often I find free papers very thin, but these were of quite a heavyweight quality - I LIKE that, AND I like the prints and images on the papers, sooo cute!
I've even blown some dust off my brads - seem to forget to use them anymore :(
I used Spellbinders' Petite Scalloped Circle Large for the cardstockcirkles, and of course here is a litlle touch of glitter. The pearls around the frontimage is made of Liquid Pearls (White Opal).

And look: I've made a matching envelope for the card :D
I love my Martha Stewart Scoreboard!

Here's the challenges I'll enter:
Scrappekammeret - Bursdag (Birthday)
Critter Sketch Challenge Blog - Celebration
The Paper Shelter - Anything Goes
Kaboodle Doodles - Let's Celebrate


Now; come on in to Fuzzy and Fancy Friday Challenge, to see what the rest of the DT have made for your inspiration, and to join this challenge.

tirsdag 3. januar 2012

Birthdaycard for a Footballboy

I never seem able to make up a little sortiment of birthdaycards for boys, to have ready when the birthdays come. I will try again this year - this is my first, and I have planned a few more already, so maybe I'll make it this year...
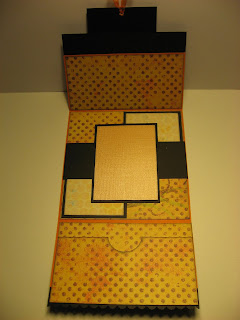
This (first) one is made as a joy-fold-card. I placed a magnet between the cardstock and the DP on the imagepanel and on the bottomoverlay to make it close better.
I have used an image from Motivet "Dexter with soccer ball" - it is such a long time since I've used these cuties, I'd almost forgotten I had them.
I coloured Dexter with ProMarkers (in our teamcolours :D), then, over the brown, furry bodyparts I put on some brown "Crushed Velvet" (bon bon flock from doodlebug design inc.)
I've tried to take a close-up of the image, I hope Dexters fur shows better here:
Because it is a card for a boy, I tried to avoid too much glitter, bling and stash, but a few rhinestones, in perfect colours for the card, cried to go with it - LOL
Inside the card I plan to use the black spaces on top for age and name of the birthdayboy (I have some leftoverscraps of the DPs used on the card, which I plan to cut letters and numbers out of with a cuttlebug-alphabet)
I used the same sketch, from Sunday Sketch and Stamp, on the middle part of the inside. On the lower part of the inside I made a pocket where we can put some money.

I'll enter this card into the following challenges:
Sunday Sketch & Stamp - Sketch
Joanna Sheen Challenges - Celebrations
Scrap'a'Long #12 - Anything Goes
Secret Crafter Saturday Challenge #166 - Anything Goes
Stampin' for the Weekend - Anything Goes
Kaboodle Doodles - Let's Celebrate!
Critter Sketch Challenge Blog - Celebration